- Challenging projects every programmer should try
- Text Editor
- 어떻게 텍스트를 띄울 것인가?
- Mesh 만들기
- Mesh를 화면에 그리기
- 전체 코드
- Next
Challenging projects every programmer should try
웹서핑 중 재미있는 포스트를 보았습니다.
“Challenging projects every programmer should try” 라는 개발자로서 도전 정신을 자극하는 제목에 이끌려 보게되었는데요.
관심이 있으시면 한 번 읽어보는 것을 권장합니다.
Text Editor
첫 번째 챌린지는 Text Edtior 입니다. 흔히 사용하는 메모장부터 notepad, Visual Stidio Code, Vim 등이 있습니다.
사실 사용만 해봤지 실제 어떻게 동작하는지에 대해서는 생각해본적이 없었습니다.
다들 개발하시면서 익숙하거나 좋아하는 프레임워크가 있으실 텐데 저는 유니티 안에서 Text Editor를 구현해볼 생각입니다.
처음에는 굉장히 쉽겠구나 생각했는데
No, you can’t use the builtin textbox component from your favorite GUI framework!
이 문장을 보고 첫 번째 난관에 봉착했습니다.
유니티에서 제공하는 Text나 Input Field 없이 어떻게 글자를 써주지..😢
어떻게 텍스트를 띄울 것인가?
우선 기본 component 없이 텍스트를 띄워주어야 합니다. 이에 대해 몇가지 안이 나왔습니다.
- GUI.Label을 이용하기
- TextMesh를 만들고 렌더링하기
- TMPro_Font Asset의 Atlas를 이용해서 Mesh를 만들고 렌더링하기
1안 GUI.Label은 imgui를 이용한 방법입니다.
가이드를 보고 바로 폐기했습니다. 디자인부터 마음에 안듭니다.
2안 TextMesh와 MeshRenderer를 이용한 방법입니다.
가이드를 보니 Text component와 유사하게 다양한 프로퍼티를 지원하고 있습니다.
단순히 text만 그리려면 이 방법을 사용했겠지만 추후 확장성과 섬세한 컨트롤을 하기위해 다음 방안으로 넘어갑시다.
3안 TMPro_Font Asset에서 글자를 가져오는 방법입니다.
이후 설명에 앞서 기본 세팅부터 진행해줍시다.
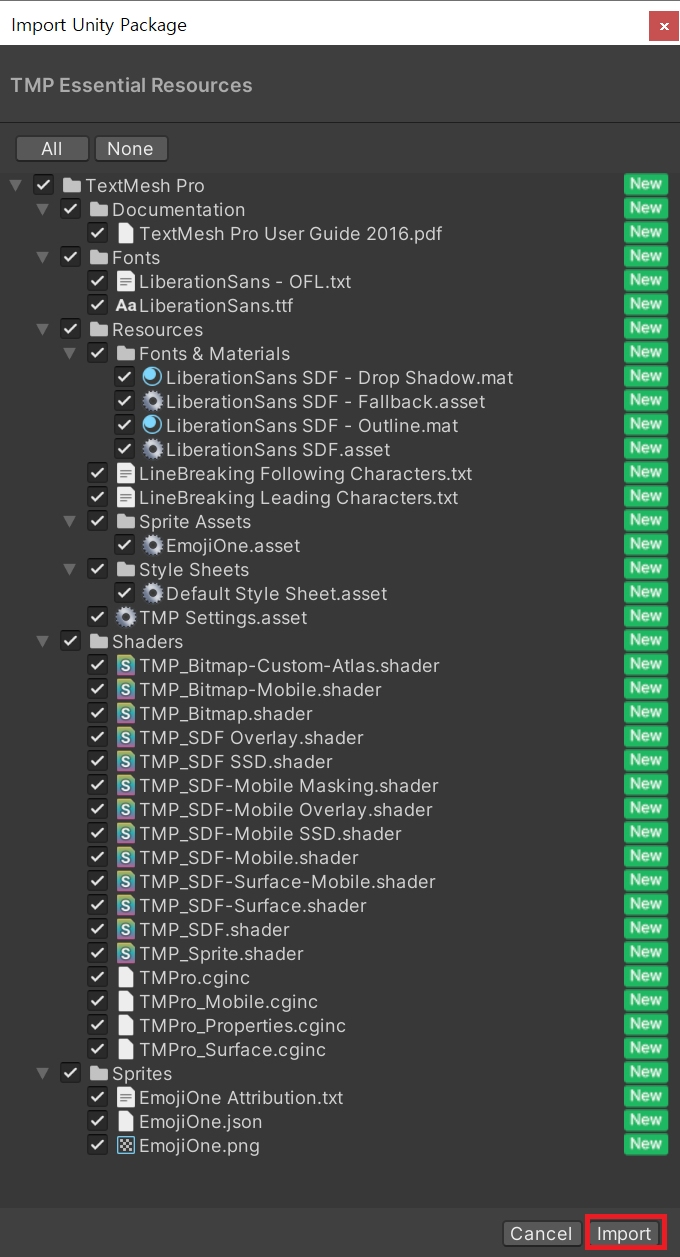
필수 애셋 설치
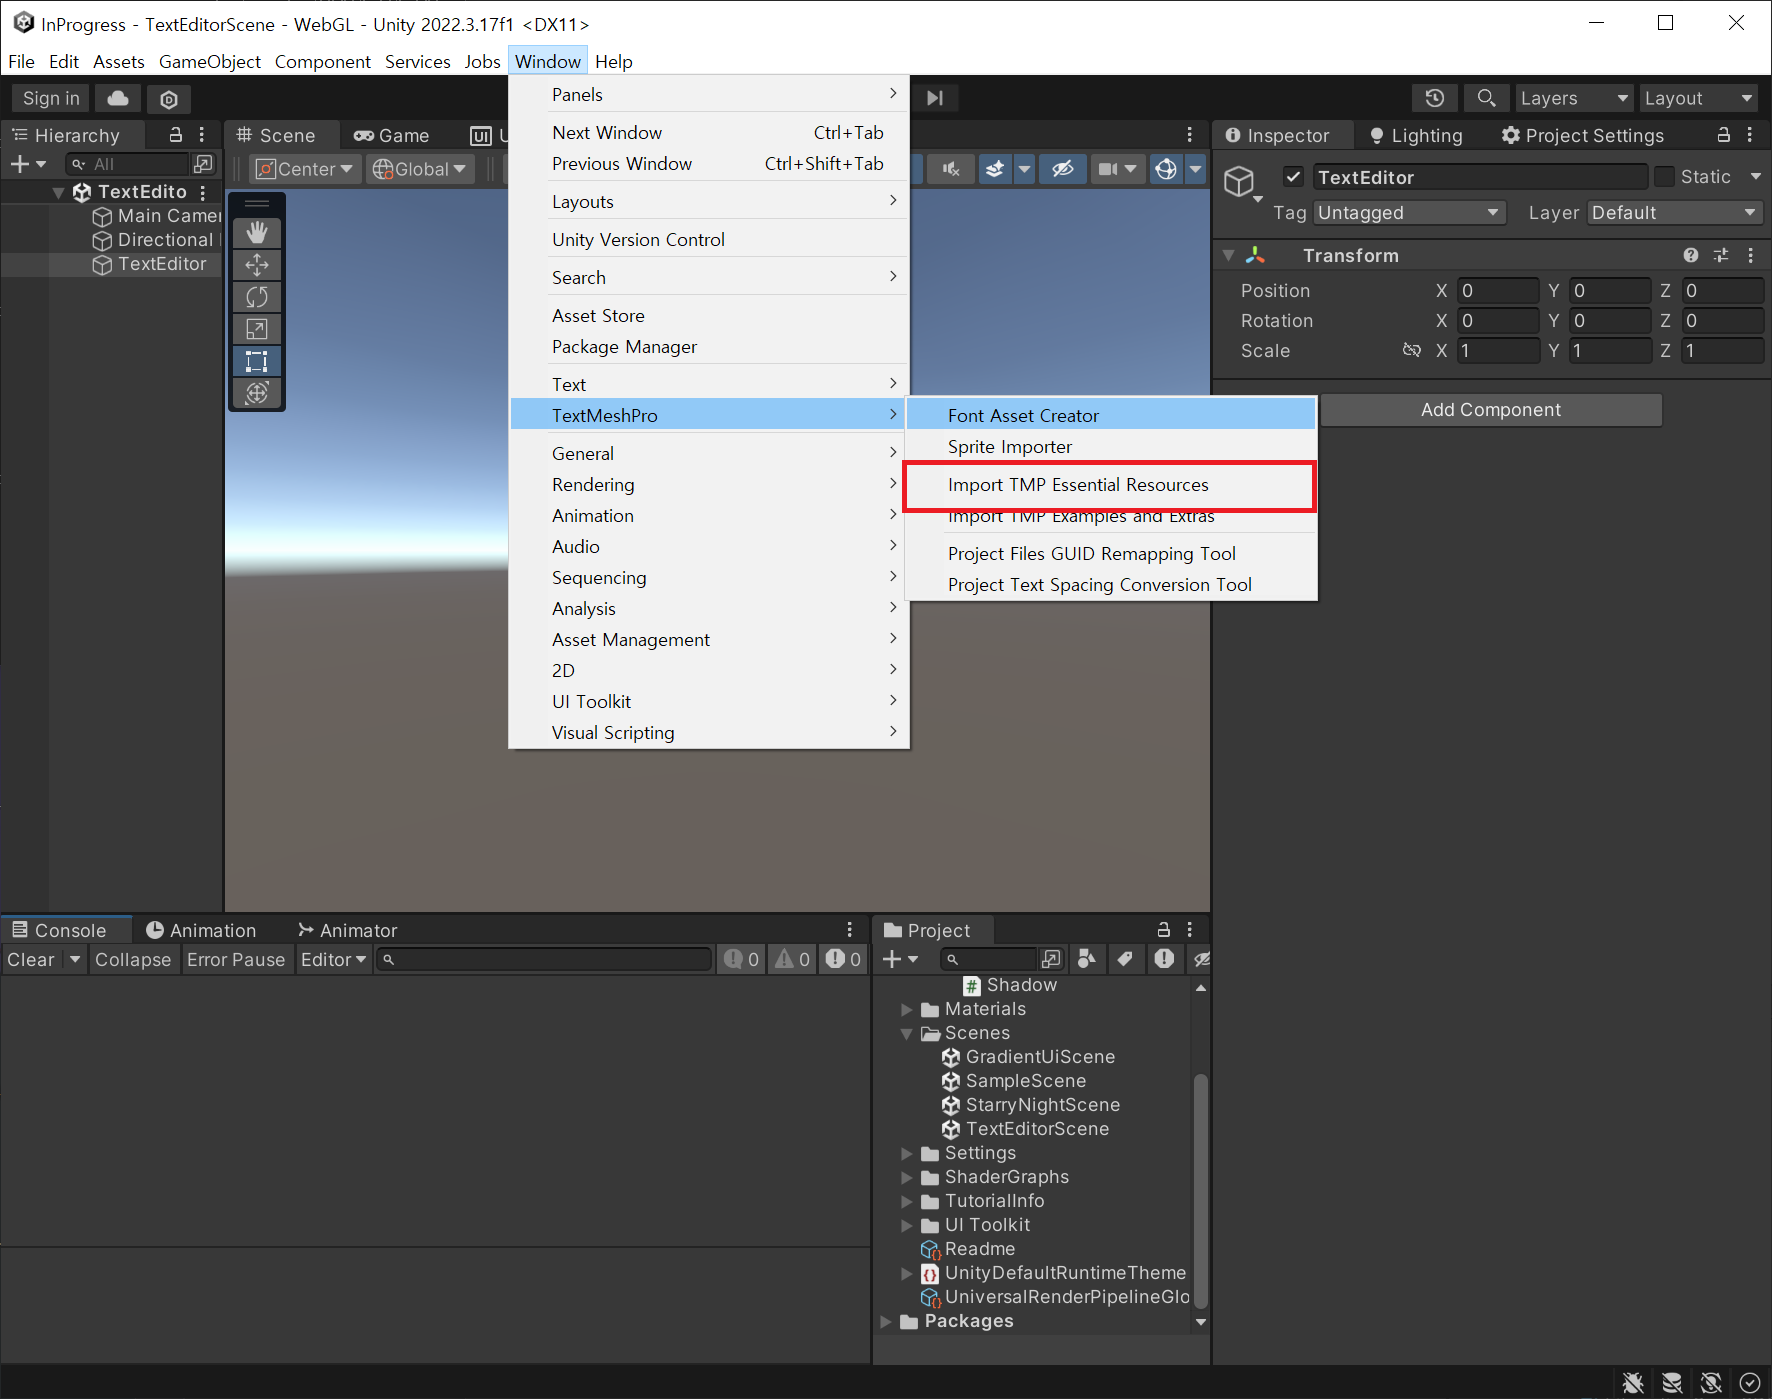
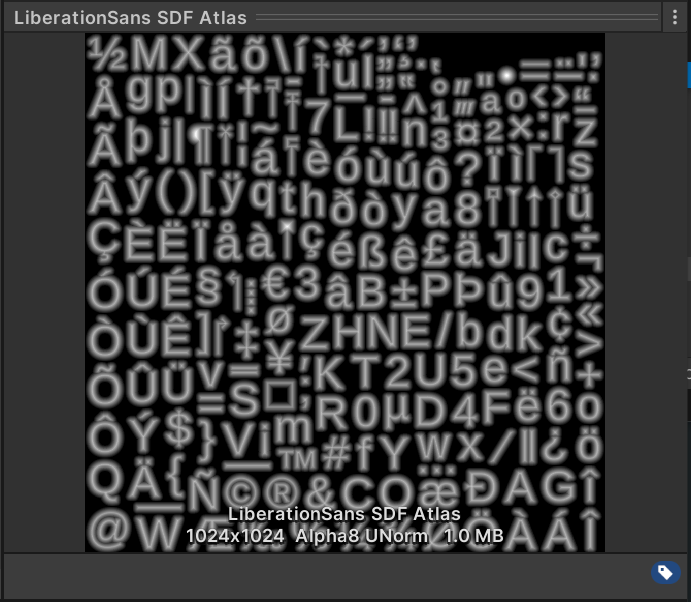
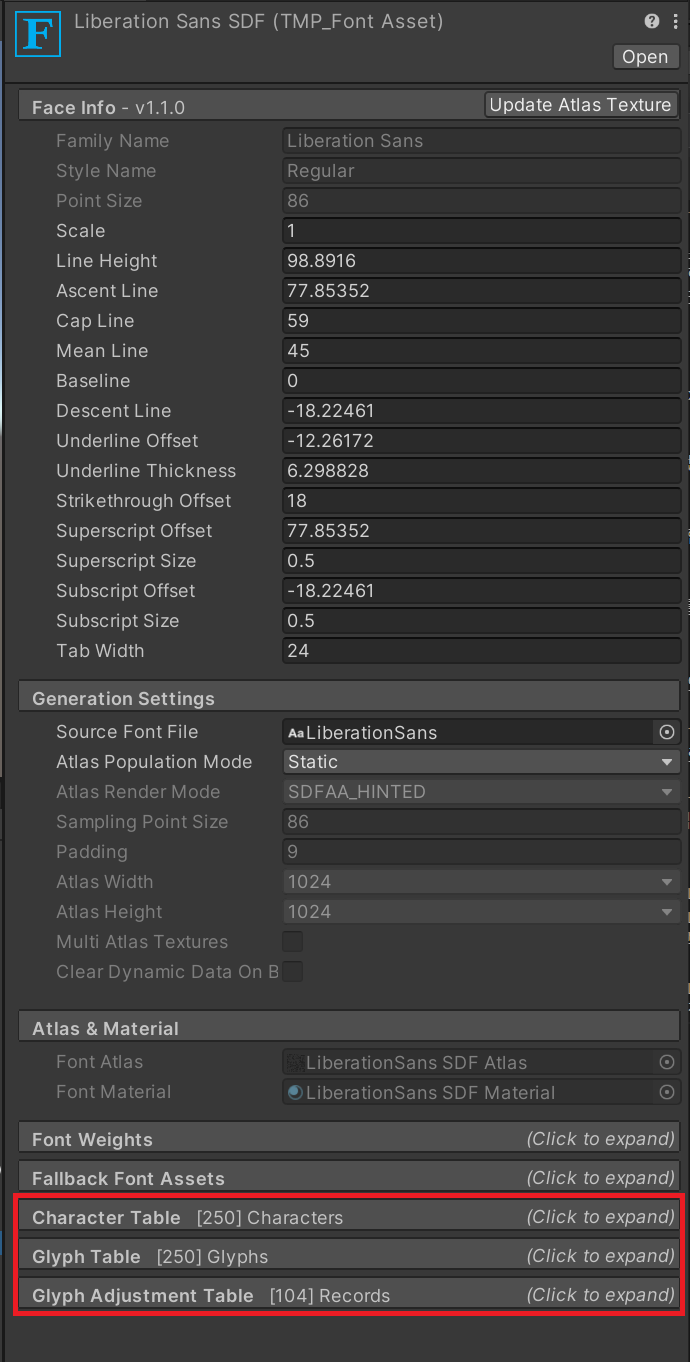
이전 경험에서 TMPro_Font Asset에는 Material과 Atlas가 있다는 것을 알고 있었습니다. Atlas는 글자들이 그려진 Texture입니다.
TMPro_Font Asset에는 여러 Table이 있는데 이 정보를 이용해서 직접 글자를 만들 수 있습니다.
Mesh 만들기
Mesh에 대해서 자세하게 설명하기는 어렵지만 개발에 필요한 내용만 소개하도록 하겠습니다.
유니티 가이드를 살펴봅시다.
Vetices
Vertex는 3D 공간상에서의 위치를 나타냅니다. 위치뿐만 아니라 다른 정보들도 포함하고 있습니다. 예를 들면 Position, Color, UV가 있습니다.
Position
실제 3D 공간상에서의 위치입니다.

우선은 실제 GlyphRect 크기에 일대일 매칭되도록 만들어봅시다.
Rect의 꼭지점들을 Vector3에 넣어줍니다.
1
2
3
4
5
6
7
8
9
10
11
12

private Vector3[] CreateGlyphVertices(Glyph glyph)
{
    var glyphRect = glyph.glyphRect;

    return new Vector3[]
    {
        new Vector3(0, 0, 0),
        new Vector3(0, glyphRect.height, 0),
        new Vector3(glyphRect.width, glyphRect.height, 0),
        new Vector3(glyphRect.width, 0, 0)
    };
}
Color
Vetex에 기본 색상을 지정해줄 수 있습니다.
1
2
3
4
5
6
7
8
9
10

private Color[] CreateColors(Color textColor)
{
    return new Color[4]
    {
        textColor,
        textColor,
        textColor,
        textColor
    };
}
Texture coordinates(UVs)
최대 8개까지 Texture를 넣어줄 수 있습니다. 이 예제에서는 font asset에서 만든 글자의 메인 텍스처만 사용합니다.
font asset의 atlas에서의 글자 위치를 0 ~ 1사이 정규화된 좌표를 구해줍니다.
이를 uv0에 넣어줄 예정입니다.
1
2
3
4
5
6
7
8
9
10
11
12

private Vector2[] CreateGlyphUVs(Glyph glyph)
{
    var glyphRect = glyph.glyphRect;

    return new Vector2[4]
    {
        new Vector2(glyphRect.x / (float)fontAsset.atlasWidth, glyphRect.y / (float)fontAsset.atlasHeight),
        new Vector2(glyphRect.x / (float)fontAsset.atlasWidth, (glyphRect.y + glyphRect.height) / (float)fontAsset.atlasHeight),
        new Vector2((glyphRect.x + glyphRect.width) / (float)fontAsset.atlasWidth, (glyphRect.y + glyphRect.height) / (float)fontAsset.atlasHeight),
        new Vector2((glyphRect.x + glyphRect.width) / (float)fontAsset.atlasWidth, glyphRect.y / (float)fontAsset.atlasHeight)
    };
}
Topology
Topology는 메시의 형태인데 유니티에서는 몇가지 형태를 지원합니다.
- Triangle
- Quad
- Lines
- LineStrip
- Points
실제로 Quad로 토폴로지를 세팅하더라도 내부적으로는 Triangle을 사용하는 걸로 알고 있지만 Quad도 지원하니 사용하도록 합니다. Topology는 Indices와 함께 세팅됩니다.
Indices
Indices는 topology를 기반으로 mesh의 표면을 만들기위해 vetices를 어떻게 구성할지 담고 있습니다.
Winding order
3D 공간상에서 어디가 앞쪽인뒤 뒤쪽인지 알기 위해 Indices 배열의 순서를 사용합니다.
 유니티에서는 “1,2,3”, “4,5,6” 이런식으로 시계 방향으로 나오는 방향이 정면입니다. 만약 뒤의 삼각형을 “6,5,4”로 할 경우 그래픽에서는 뒷면이 보이게 됩니다.
이 예제에서는 Topology Quad를 사용하므로 아래 코드와 같이 Mesh를 만들어 줍니다.
1
2
3
4
5
6
7
8
9
10

private Mesh CreateMesh(Glyph glyph)
{
    // Create mesh
    Mesh mesh = new();
    mesh.SetVertices(CreateGlyphVertices(glyph));
    mesh.SetColors(CreateGlyphColors(Color.black));
    mesh.SetUVs(0, CreateGlyphUVs(glyph));
    mesh.SetIndices(new int[4] { 0, 1, 2, 3 }, MeshTopology.Quads, 0);
    return mesh;
}
Mesh를 화면에 그리기
앞선 예제로 메시를 만들었으니 이번에는 화면에 그려보도록 하겠습니다. MeshRenderer와 MeshFilter를 사용합니다.
1
2
3
4
5
6
7
8
9
10
11
12
13

private GameObject CreateCharObject(char character, Mesh mesh)
{
    GameObject charObject = new GameObject($"Char_{character}");
    charObject.transform.parent = transform;

    MeshRenderer meshRenderer = charObject.AddComponent<MeshRenderer>();
    meshRenderer.material = fontAsset.material;

    MeshFilter meshFilter = charObject.AddComponent<MeshFilter>();
    meshFilter.mesh = mesh;

    return charObject;
}
아마 실행시켜보면 글자가 너무 커서 화면 밖을 넘어갈 겁니다.
글자 크기나 위치는 추후 조정할 내용이라 Scene 화면을 통해 잘 나오는지 확인해줍니다.
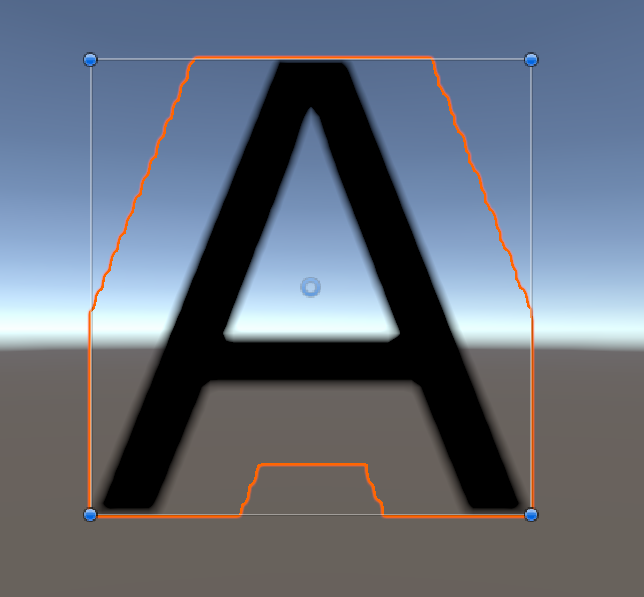
이럴수가.. 뿌옇게 나옵니다.😢
material 수정하기
실제 TextMeshPro에서는 SDF 라는 렌더링 기법을 사용합니다. 정확히 어떻게 동작하는지 알 수는 없지만 shader에 이러한 렌더링 기법들이 포함되어 있습니다. 이를 변경해봅시다.
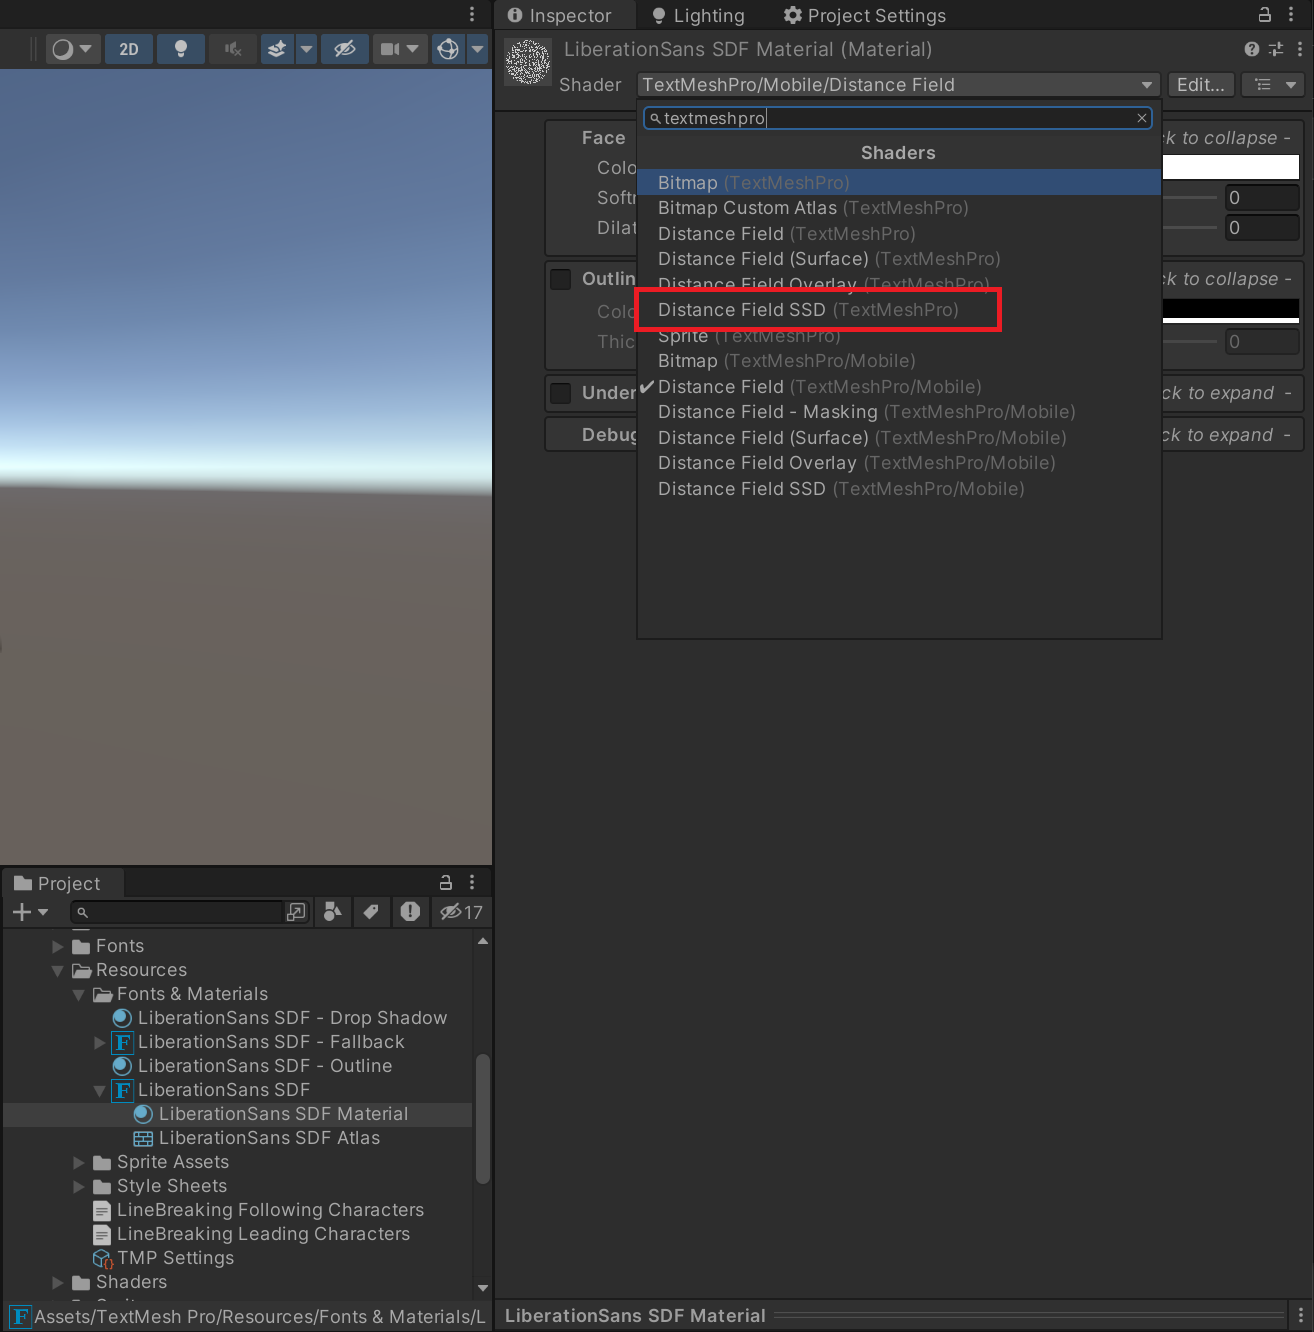
Font Asset의 Material에서 Shader를 TextMeshPro/Distance Field SSD로 변경해줍니다.
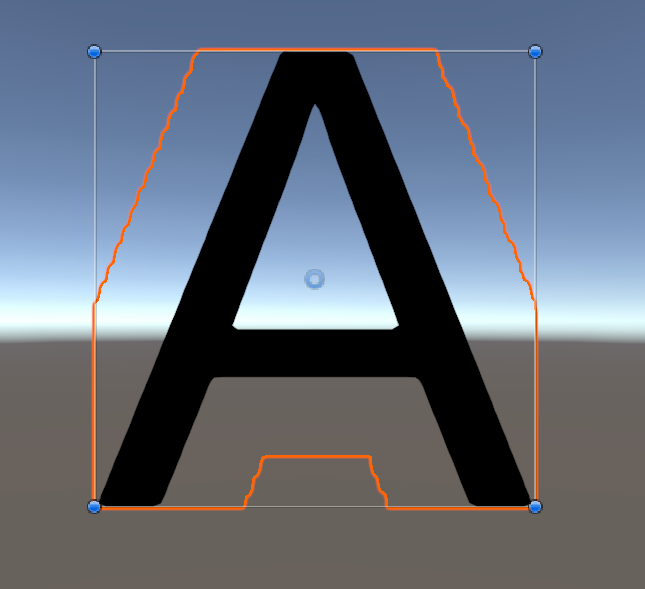
깔끔하게 나오는 것을 확인했습니다.😆
전체 코드
1
2
3
4
5
6
7
8
9
10
11
12
13
14
15
16
17
18
19
20
21
22
23
24
25
26
27
28
29
30
31
32
33
34
35
36
37
38
39
40
41
42
43
44
45
46
47
48
49
50
51
52
53
54
55
56
57
58
59
60
61
62
63
64
65
66
67
68
69
70
71
72
73
74
75
76
77
78
79
80
81
82
83
84
85
86
87
88
89

using TMPro;
using UnityEngine;
using UnityEngine.TextCore;

public class TextEditor : MonoBehaviour
{
    public TMP_FontAsset fontAsset;

    void Start()
    {
        RenderCharacter('A');
    }

    void RenderCharacter(char character)
    {
        if (fontAsset.characterLookupTable.TryGetValue(character, out TMP_Character tmpCharacter))
        {
            var glyph = tmpCharacter.glyph;
            var mesh = CreateMesh(glyph);
            CreateCharObject(character, mesh);
        }
        else
        {
            Debug.LogError($"LookupTable에 없는 문자 : {character}");
        }
    }

    private Mesh CreateMesh(Glyph glyph)
    {
        // Create mesh
        Mesh mesh = new();
        mesh.SetVertices(CreateGlyphVertices(glyph));
        mesh.SetColors(CreateGlyphColors(Color.black));
        mesh.SetUVs(0, CreateGlyphUVs(glyph));
        mesh.SetIndices(new int[4] { 0, 1, 2, 3 }, MeshTopology.Quads, 0);
        return mesh;
    }

    private Vector3[] CreateGlyphVertices(Glyph glyph)
    {
        var glyphRect = glyph.glyphRect;

        return new Vector3[4]
        {
            new Vector3(0, 0, 0),
            new Vector3(0, glyphRect.height, 0),
            new Vector3(glyphRect.width, glyphRect.height, 0),
            new Vector3(glyphRect.width, 0, 0)
        };
    }

    private Color[] CreateGlyphColors(Color textColor)
    {
        return new Color[4]
        {
            textColor,
            textColor,
            textColor,
            textColor
        };
    }

    private Vector2[] CreateGlyphUVs(Glyph glyph)
    {
        var glyphRect = glyph.glyphRect;

        return new Vector2[4]
        {
            new Vector2(glyphRect.x / (float)fontAsset.atlasWidth, glyphRect.y / (float)fontAsset.atlasHeight),
            new Vector2(glyphRect.x / (float)fontAsset.atlasWidth, (glyphRect.y + glyphRect.height) / (float)fontAsset.atlasHeight),
            new Vector2((glyphRect.x + glyphRect.width) / (float)fontAsset.atlasWidth, (glyphRect.y + glyphRect.height) / (float)fontAsset.atlasHeight),
            new Vector2((glyphRect.x + glyphRect.width) / (float)fontAsset.atlasWidth, glyphRect.y / (float)fontAsset.atlasHeight)
        };
    }

    private GameObject CreateCharObject(char character, Mesh mesh)
    {
        GameObject charObject = new GameObject($"Char_{character}");
        charObject.transform.parent = transform;

        MeshRenderer meshRenderer = charObject.AddComponent<MeshRenderer>();
        meshRenderer.material = fontAsset.material;

        MeshFilter meshFilter = charObject.AddComponent<MeshFilter>();
        meshFilter.mesh = mesh;

        return charObject;
    }
}
Next
다음에는 글자를 렌더링하는게 아닌 문장을 렌더링하는 방법, 글자 사이 간격, 글자 크기, 글자를 그려줄 위치 등도 같이 고려해서 작업을 할 예정입니다.
← Previous Post Next Post →