이전 포스팅
Challenging projects every programmer should try - Text Editor(1)
문자열 출력하기
이번에는 문자열을 출력에 도전해봅시다.
예시답게 "Hello, World!"를 출력하려 하는데요.
문자열을 출력하기 위해서는 글자 사이 간격뿐만 아니라 각 글자들이 같은 베이스 라인을 기준으로 그려지고 있다는 점을 고려해야 합니다.
이때 Glyph Table에 있는 정보들을 활용해줄 수 있습니다.
Glyph Table 이해하기
폰트 애셋 안에 있는 Glyph Table에서 첫번째 문자 "를 찾아봅시다.
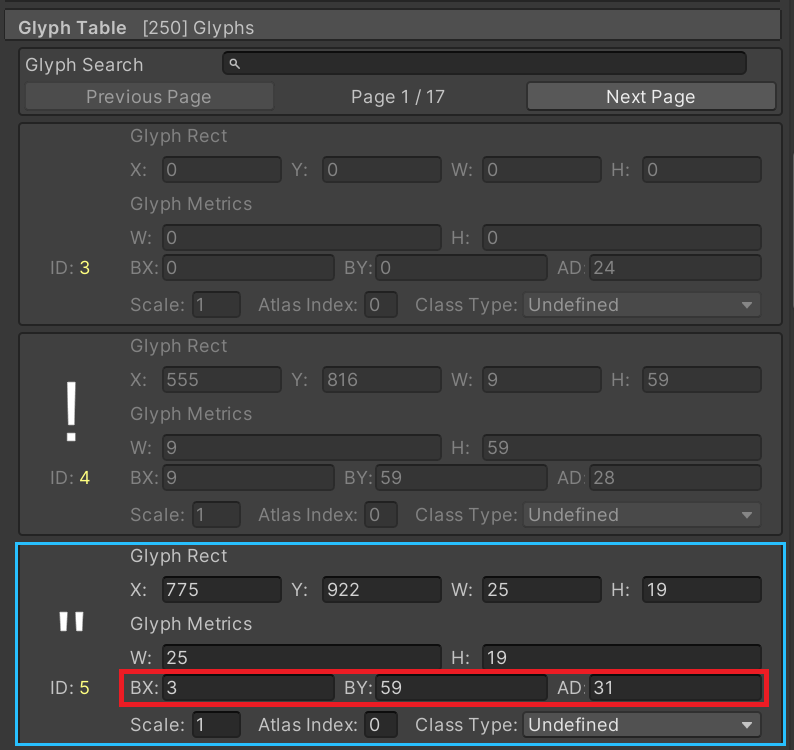 Glyph Metrics에
 BX, BY, AD가 있는 것을 확인할 수 있습니다.
GlyphMetrics의 구조체에서 해당 프로퍼티가 어떤 용도인지 설명이 있습니다.
1
2
3
4
5
6
7
8
9
10
11
12
13
14
15
16
17
18
19
20
21
22

public struct GlyphMetrics : IEquatable<GlyphMetrics>
{
    ...

    //
    // 요약:
    //     The horizontal distance from the current drawing position (origin) relative to
    //     the element's left bounding box edge (bbox).
    public float horizontalBearingX { get; set; }
    //
    // 요약:
    //     The vertical distance from the current baseline relative to the element's top
    //     bounding box edge (bbox).
    public float horizontalBearingY { get; set; }
    //
    // 요약:
    //     The horizontal distance to increase (left to right) or decrease (right to left)
    //     the drawing position relative to the origin of the text element.
    public float horizontalAdvance { get; set; }

    ...
}
BX는 바운딩 박스 왼쪽 모서리에서 수평방향으로 얼마나 떨어져있냐를 의미합니다. 즉, 좌측 여백이라 생각합시다.
BY는 바운딩 박스 상단 모서리에서 베이스라인까지 수직방향으로 얼마나 떨어져있냐를 의미합니다. 즉, 상단 높이라 생각합시다.
AD는 텍스트가 그려지고 수평방향으로 얼마만큼 이동해야하는지를 의미합니다. 즉 다음 글자와의 수평거리라 생각합시다.


위 이미지는 구글링 했을 때 가장 좋은 예시라 생각되어 이미지를 가져왔습니다.
포스팅을 다하고 나중에 알게된 내용이지만 TMP_TextInfoDebugTool.cs를 통해서도 확인할 수 있다는 것을 알게되었습니다.😭
잠깐 이전 포스트의 코드를 살펴봅시다.
1
2
3
4
5
6
7
8
9
10
11
12

private Vector3[] CreateGlyphVertices(Glyph glyph)
{
    var glyphRect = glyph.glyphRect;

    return new Vector3[]
    {
        new Vector3(0, 0, 0),
        new Vector3(0, glyphRect.height, 0),
        new Vector3(glyphRect.width, glyphRect.height, 0),
        new Vector3(glyphRect.width, 0, 0)
    };
}
이전에는 정말 단순하게 좌측하단을 (0, 0)으로 생각했지만 이제는 BX, BY도 같이 고려해줍시다.
좌표를 다시 지정하면 다음과 같이 바꿀 수 있습니다.
1
2
3
4
5
6
7
8
9
10
11
12
13
14
15

private Vector3[] CreateGlyphVertices(Glyph glyph)
{
    var width = glyph.metrics.width;
    var height = glyph.metrics.height;
    var bx = glyph.metrics.horizontalBearingX;
    var by = glyph.metrics.horizontalBearingY;

    return new Vector3[]
    {
        new Vector3(bx, by - height, 0),
        new Vector3(bx, by, 0),
        new Vector3(bx + width, by, 0),
        new Vector3(bx + width, by - height, 0)
    };
}
AD는 단순하게 문자의 로컬 포지션만 이동하는 것으로 해결할 수 있습니다.
1
2
3
4
5
6
7
8
9
10
11
12
13
14
15
16
17

void RenderCharacter(char character, ref float posX)
{
    if (fontAsset.characterLookupTable.TryGetValue(character, out TMP_Character tmpCharacter))
    {
        var glyph = tmpCharacter.glyph;
        var mesh = CreateMesh(glyph);
        var charObject = CreateCharObject(character, mesh);

        charObject.transform.localPosition = new Vector3(posX, 0, 0);
        // 다음 글자의 시작 위치
        posX += glyph.metrics.horizontalAdvance;
    }
    else
    {
        Debug.LogError($"LookupTable에 없는 문자 : {character}");
    }
}
Glyph Adjustment Table 이해하기
Glyph Table만 적용해도 문제가 없지만 기왕 시작한거 Adjustment Table도 적용해봅시다.
예문 “Hello, World!”에서 ‘W’와 ‘o’를 찾아보면
아래와 같이 AX가 지정되어 있습니다.
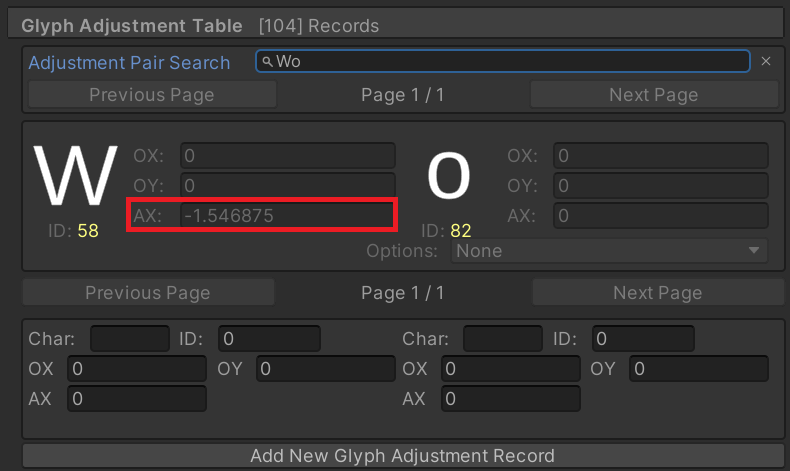
왼쪽에 있는 AX의 값은 글자사이의 간격을 해당 값만큼 조절하라는 의미입니다.
해당 값은 아래와 같이 구해줄 수 있습니다.
1
2
3
4
5
6
7
8
9
10
11
12
13
14
15
16

private float GetAdvanceX(char prevChar, char nextChar)
{
    var previousGlyphIndex = fontAsset.characterLookupTable[prevChar].glyphIndex;
    var currentGlyphIndex = fontAsset.characterLookupTable[nextChar].glyphIndex;

    foreach (var record in fontAsset.fontFeatureTable.glyphPairAdjustmentRecords)
    {
        if (record.firstAdjustmentRecord.glyphIndex == previousGlyphIndex
            && record.secondAdjustmentRecord.glyphIndex == currentGlyphIndex)
        {
            return record.firstAdjustmentRecord.glyphValueRecord.xAdvance;
        }
    }

    return 0.0f;
}
우선 라인에 문자열을 출력하는 함수는 간단하게 만들어봅니다.
1
2
3
4
5
6
7
8
9
10
11
12
13
14

void RenderStringInLine(string str)
{
    float posX = 0.0f;

    for (int i = 0; i < str.Length; i++)
    {
        char ch = str[i];

        if (i != 0)
            posX += GetAdvanceX(str[i - 1], ch);

        RenderCharacter(ch, ref posX);
    }
}
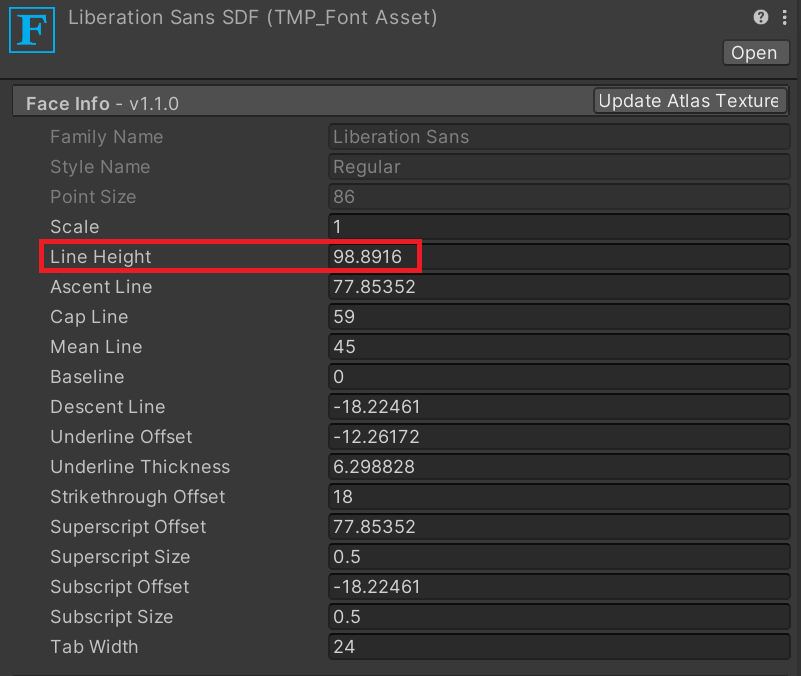
라인간의 간격
라인간의 간격에는 Face Info의 Line Height 속성을 적용할 겁니다.
1
2
3
4
5
6
7
8
9
10
11
12
13
14
15
16
17
18
19
20
21
22
23
24
25
26
27
28
29
30
31
32
33
34
35

void RenderStringInLine(string str, int lineNum)
{
    float posX = 0.0f;
    float posY = -1 * fontAsset.faceInfo.lineHeight * (lineNum - 1);

    for (int i = 0; i < str.Length; i++)
    {
        char ch = str[i];

        if (i != 0)
            posX += GetAdvanceX(str[i - 1], ch);

        RenderCharacter(ch, ref posX, ref posY);
    }
}

void RenderCharacter(char character, ref float posX, ref float posY)
{
    // char는 uint로 암시적 형변환
    if (fontAsset.characterLookupTable.TryGetValue(character, out TMP_Character tmpCharacter))
    {
        var glyph = tmpCharacter.glyph;
        var mesh = CreateMesh(glyph);
        var charObject = CreateCharObject(character, mesh);

        // 문자의 위치를 조정
        charObject.transform.localPosition = new Vector3(posX, posY, 0);
        // 다음 글자의 시작 위치
        posX += glyph.metrics.horizontalAdvance;
    }
    else
    {
        Debug.LogError($"LookupTable에 없는 문자 : {character}");
    }
}
posY를 line 높이만큼 낮춰서 그려주면 됩니다.
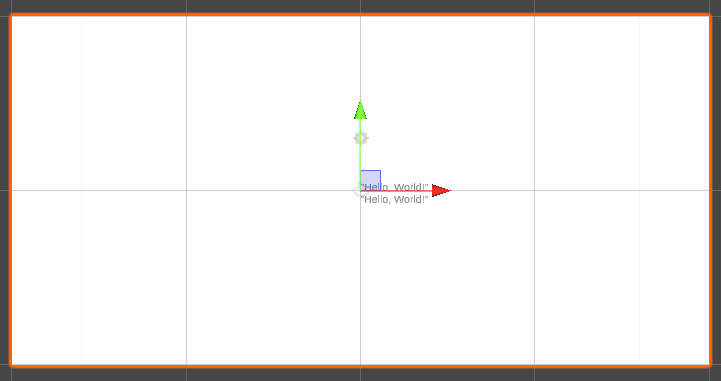
화면 크기 맞추기
현재 vertice 사이즈를 커서 카메라에 다 안들어옵니다.
우선 카메라 세팅을 orthographic으로 바꾸고 size는 10 정도로 맞춥니다.

fontScale 변수를 만들어서 리사이징에 사용합니다.
1
2
3
4
5
6
7
8
9
10
11
12
13
14
15
16
17
18
19
20
21
22
23
24
25
26
27
28
29
30
31
32
33
34
35
36
37
38
39
40
41
42
43
44
45
46
47
48
49
50
51
52
53
54
55
56
57
58
59
60

float fontScale = 1f;
public float defaultFontSize = 12f;
private float scale = 0.05f;

void Start()
{
    fontScale = defaultFontSize / fontAsset.faceInfo.pointSize * scale;

    RenderStringInLine("\"Hello, World!\"", 1);
    RenderStringInLine("\"Hello, World!\"", 2);
}
...
void RenderCharacter(char character, ref float posX, ref float posY)
{
    if (fontAsset.characterLookupTable.TryGetValue(character, out TMP_Character tmpCharacter))
    {
        var glyph = tmpCharacter.glyph;
        var mesh = CreateMesh(glyph);
        var charObject = CreateCharObject(character, mesh);

        charObject.transform.localPosition = new Vector3(posX, posY, 0);
        posX += glyph.metrics.horizontalAdvance * fontScale;
    }
    else
    {
        Debug.LogError($"LookupTable에 없는 문자 : {character}");
    }
}
...
    private Vector3[] CreateGlyphVertices(Glyph glyph)
{
    var width = glyph.metrics.width * fontScale;
    var height = glyph.metrics.height * fontScale;
    var bx = glyph.metrics.horizontalBearingX * fontScale;
    var by = glyph.metrics.horizontalBearingY * fontScale;

    return new Vector3[]
    {
        new Vector3(bx, by - height, 0),
        new Vector3(bx, by, 0),
        new Vector3(bx + width, by, 0),
        new Vector3(bx + width, by - height, 0)
    };
}
...
void RenderStringInLine(string str, int lineNum)
{
    float posX = 0.0f;
    float posY = -1 * fontAsset.faceInfo.lineHeight * (lineNum - 1) * fontScale;

    for (int i = 0; i < str.Length; i++)
    {
        char ch = str[i];

        if (i != 0)
            posX += GetAdvanceX(str[i - 1], ch) * fontScale;

        RenderCharacter(ch, ref posX, ref posY);
    }
}
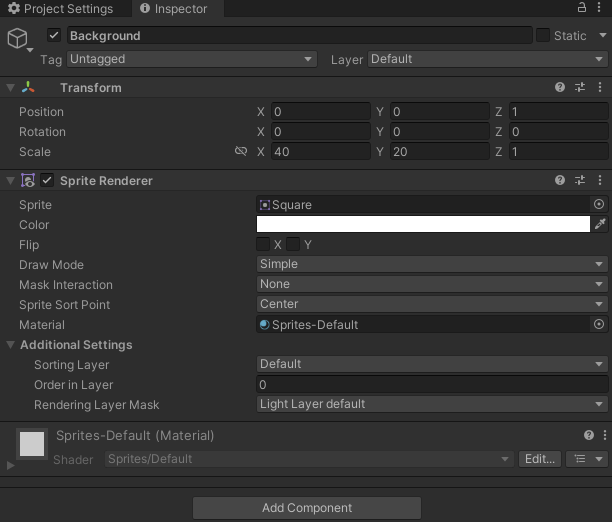
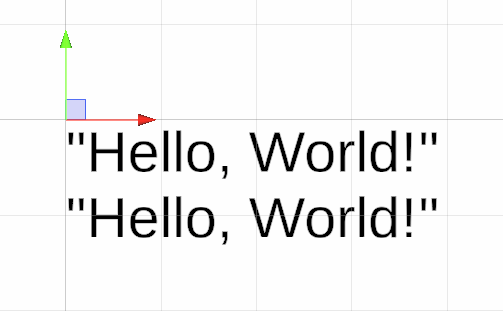
간단하게 background를 만들어줍니다.
실행화면
다 좋은데 몇가지 마음에 안드는 점이 있습니다.
- 글자가 화면 가운데 있는 점
- 글자의 원점(0, 0)이 좌측 하단이라는 점
글자들을 좌측 상단으로 이동시키는 것은 TextEditor 게임 오브젝트의 Position을 수정해주면 간단히 해결됩니다.
하지만 글자의 원점이 좌측 하단이라는 점이 계산에 방해가 되므로 (0, 0)을 좌측 상단으로 바꿔봅시다.
1
2
3
4
5
6
7
8
9
10
11
12
13
14
15
16
17
18
19
20
21
22
23
24
25
26
27
28
29

private Vector3[] CreateGlyphVertices(Glyph glyph)
{
    var width = glyph.metrics.width * fontScale;
    var height = glyph.metrics.height * fontScale;
    var bx = glyph.metrics.horizontalBearingX * fontScale;
    var by = glyph.metrics.horizontalBearingY * fontScale;
    var ascentLine = fontAsset.faceInfo.ascentLine * fontScale;

    return new Vector3[]
    {
        new Vector3(bx, -ascentLine + by, 0),
        new Vector3(bx + width, -ascentLine + by, 0),
        new Vector3(bx + width, -ascentLine + by - height, 0),
        new Vector3(bx, -ascentLine + by - height, 0),
    };
}

private Vector2[] CreateGlyphUVs(Glyph glyph)
{
    var glyphRect = glyph.glyphRect;

    return new Vector2[4]
    {
        new Vector2(glyphRect.x / (float)fontAsset.atlasWidth, (glyphRect.y + glyphRect.height) / (float)fontAsset.atlasHeight),
        new Vector2((glyphRect.x + glyphRect.width) / (float)fontAsset.atlasWidth, (glyphRect.y + glyphRect.height) / (float)fontAsset.atlasHeight),
        new Vector2((glyphRect.x + glyphRect.width) / (float)fontAsset.atlasWidth, glyphRect.y / (float)fontAsset.atlasHeight),
        new Vector2(glyphRect.x / (float)fontAsset.atlasWidth, glyphRect.y / (float)fontAsset.atlasHeight),
    };
}
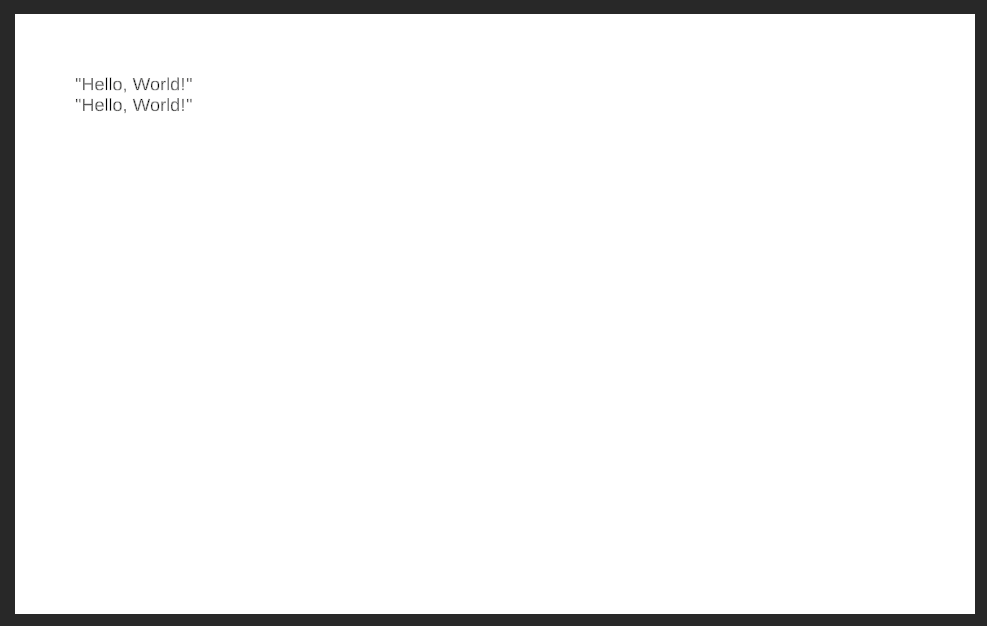
원점을 좌상단에 잘 배치하였습니다.😆
이제 TextEditor 게임 오브젝트의 Position을 적당히 이동시켜주면 완성입니다.
전체 코드
1
2
3
4
5
6
7
8
9
10
11
12
13
14
15
16
17
18
19
20
21
22
23
24
25
26
27
28
29
30
31
32
33
34
35
36
37
38
39
40
41
42
43
44
45
46
47
48
49
50
51
52
53
54
55
56
57
58
59
60
61
62
63
64
65
66
67
68
69
70
71
72
73
74
75
76
77
78
79
80
81
82
83
84
85
86
87
88
89
90
91
92
93
94
95
96
97
98
99
100
101
102
103
104
105
106
107
108
109
110
111
112
113
114
115
116
117
118
119
120
121
122
123
124
125
126
127
128
129
130
131
132
133
134
135
136
137
138
139
140
141

using System;
using TMPro;
using UnityEngine;
using UnityEngine.TextCore;

public class TextEditor : MonoBehaviour
{
    public TMP_FontAsset fontAsset;

    float fontScale = 1f;
    public float defaultFontSize = 12f;
    private float scale = 0.05f;

    void Start()
    {
        fontScale = defaultFontSize / fontAsset.faceInfo.pointSize * scale;

        RenderStringInLine("\"Hello, World!\"", 1);
        RenderStringInLine("\"Hello, World!\"", 2);
    }

    void RenderCharacter(char character, ref float posX, ref float posY)
    {
        // char는 uint로 암시적 형변환
        if (fontAsset.characterLookupTable.TryGetValue(character, out TMP_Character tmpCharacter))
        {
            var glyph = tmpCharacter.glyph;
            var mesh = CreateMesh(glyph);
            var charObject = CreateCharObject(character, mesh);

            // 문자의 위치를 조정
            charObject.transform.localPosition = new Vector3(posX, posY, 0);
            // 다음 글자의 시작 위치
            posX += glyph.metrics.horizontalAdvance * fontScale;
        }
        else
        {
            Debug.LogError($"LookupTable에 없는 문자 : {character}");
        }
    }

    private Mesh CreateMesh(Glyph glyph)
    {
        // Create mesh
        Mesh mesh = new();
        mesh.SetVertices(CreateGlyphVertices(glyph));
        mesh.SetColors(CreateGlyphColors(Color.black));
        mesh.SetUVs(0, CreateGlyphUVs(glyph));
        mesh.SetIndices(new int[4] { 0, 1, 2, 3 }, MeshTopology.Quads, 0);
        return mesh;
    }

    private Vector3[] CreateGlyphVertices(Glyph glyph)
    {
        var width = glyph.metrics.width * fontScale;
        var height = glyph.metrics.height * fontScale;
        var bx = glyph.metrics.horizontalBearingX * fontScale;
        var by = glyph.metrics.horizontalBearingY * fontScale;
        var ascentLine = fontAsset.faceInfo.ascentLine * fontScale;

        return new Vector3[]
        {
            new Vector3(bx, -ascentLine + by, 0),
            new Vector3(bx + width, -ascentLine + by, 0),
            new Vector3(bx + width, -ascentLine + by - height, 0),
            new Vector3(bx, -ascentLine + by - height, 0),
        };
    }

    private Color[] CreateGlyphColors(Color textColor)
    {
        return new Color[4]
        {
            textColor,
            textColor,
            textColor,
            textColor
        };
    }

    private Vector2[] CreateGlyphUVs(Glyph glyph)
    {
        var glyphRect = glyph.glyphRect;

        return new Vector2[4]
        {
            new Vector2(glyphRect.x / (float)fontAsset.atlasWidth, (glyphRect.y + glyphRect.height) / (float)fontAsset.atlasHeight),
            new Vector2((glyphRect.x + glyphRect.width) / (float)fontAsset.atlasWidth, (glyphRect.y + glyphRect.height) / (float)fontAsset.atlasHeight),
            new Vector2((glyphRect.x + glyphRect.width) / (float)fontAsset.atlasWidth, glyphRect.y / (float)fontAsset.atlasHeight),
            new Vector2(glyphRect.x / (float)fontAsset.atlasWidth, glyphRect.y / (float)fontAsset.atlasHeight),
        };
    }

    private GameObject CreateCharObject(char character, Mesh mesh)
    {
        GameObject charObject = new GameObject($"Char_{character}");
        charObject.transform.parent = transform;

        MeshRenderer meshRenderer = charObject.AddComponent<MeshRenderer>();
        meshRenderer.material = fontAsset.material;

        MeshFilter meshFilter = charObject.AddComponent<MeshFilter>();
        meshFilter.mesh = mesh;

        return charObject;
    }

    void RenderStringInLine(string str, int lineNum)
    {
        float posX = 0.0f;
        float posY = -1 * fontAsset.faceInfo.lineHeight * (lineNum - 1) * fontScale;

        for (int i = 0; i < str.Length; i++)
        {
            char ch = str[i];

            if (i != 0)
                posX += GetAdvanceX(str[i - 1], ch) * fontScale;

            RenderCharacter(ch, ref posX, ref posY);
        }
    }

    private float GetAdvanceX(char prevChar, char nextChar)
    {
        var previousGlyphIndex = fontAsset.characterLookupTable[prevChar].glyphIndex;
        var currentGlyphIndex = fontAsset.characterLookupTable[nextChar].glyphIndex;

        foreach (var record in fontAsset.fontFeatureTable.glyphPairAdjustmentRecords)
        {
            if (record.firstAdjustmentRecord.glyphIndex == previousGlyphIndex
                && record.secondAdjustmentRecord.glyphIndex == currentGlyphIndex)
            {
                return record.firstAdjustmentRecord.glyphValueRecord.xAdvance;
            }
        }

        return 0.0f;
    }
}
Next
다음에는 글자를 입력받고 출력, 커서 생성을 진행할 예정입니다.
← Previous Post Next Post →